An instructional video for setting up and running the ARC can be found
here
Install open-source tools for running the ARC (Activity recording CAFE)
(from http://javagrinders-arc.blogspot.com)
This guide walks you through the steps needed to run the ARC instrument. It is a system that permits the automated measurement of motion and food consumption of individual fruit flies. It will show you how to download a number of open source software tools, to set them up in a way that they play nicely with each other, and to make them available to the JavaGrinders framework for the control of behavioral experiments. These instructions cover Mac OSX 10.11.6, xUbuntu 16.04, and Raspbian Jessie (for Raspberry Pi 3B), and Ubuntu 16.04 Arm64 (for Odroid C2). Help in adding instructions for Windows 7-9 or Windows 10 are always greatly welcome.
Table of Contents
- Install open-source tools for running the ARC (Activity recording CAFE)
- Table of Contents
- What you need …
- Installation #1 - Java Standard Edition 8 Development Kit (Java SE 8 JDK)
- Installation #2 - Java IDE
- Installation #3 - OpenCV
- Installation #4 - Import the ARCController Project into IDE and Run
- Installation #5 (optional) - Confirm that the plugged-in Arduino is loaded as a USB communication device (CDC)
- Installation #6 (optional) - Install JArduino Firmware on Arduino for stimulus delivery
What you need …
-
Computer running MacOSX or some flavor of Linux. Preferred and tested OS options are MacOSX 10.11, Xubuntu 18.04, Ubuntu 18.04, Debian Jessie and Stretch. Tracking speed scales up with increased processing power, but even lower hardware specs should be sufficient to run the ARC in its basic capacity.
-
Source of Video Frames. A wide range of options are supported via standard drivers through any OpenCV compatible source. This includes most webcams, network cameras, or serial camera modules.
-
Administrator Rights on Computer. Account must have with rights to administer the computer as installation of libraries requires the password.
-
Internet access. You need to obtain the libraries and applications from the internet. Some downloads are fairly large, so a connection via ethernet (or a reliable and fast wifi) are needed.
-
Java Integrated Development Environment (IDE). Eclipse and Netbeans are the dominant players and zipped JavaGrinders_ARC project folders are included for a clean import.
-
Arduino Uno. This is an open-source, single board microcontroller.
-
Libraries, Drivers, Applications. A number of libraries, drivers, and applications are required to support the tracking framework and to provide programming access to webcams, usb devices, microcontrollers, and image processing.
Installation #1 - Java Standard Edition 8 Development Kit (Java SE 8 JDK) or higher
The JDK is a development environment for building and running software written in the Java programming language. Most operating systems come pre-installed with the ability to run Java applications via a Java Runtime Environment (JRE). Developing Java software requires additional tools from Java’s Software Development Kit (SDK), including the Java Compiler ‘javac’.
Test whether Java SE 8 SDK is already installed
To test whether Java 8 SDK is available, test for your version of the java compiler ‘javac’. Open a Terminal, found in Applications/Utilities on Mac OSX and Terminal Emulator in Linux, and type…
$ javac -version
- YES:
- You are fine if the terminal reports any build '1.8.0_*' .
This means that you already have a Java Compiler of Version 8. Mine is
javac 1.8.0_151
NO:
If the terminal reports that no SDK is available
-bash: javac: command not found
or if a version prior to 8 is found, then you need to download and install the Java SE 8 or later Development Kit. The ARC framework works well with the JDK for Java 13 and my recommendation is to use the newest version. Moreover, recent versions of the OpenCV library will require installations of a recent Java tool chain.
Installation Instructions - MacOSX:
You can install the OpenJDK version (preferred), or the version from Oracle.
OpenJDK:
Download the MacOSX version you want (currently JDK13+33) from the OpenJDK archive.
In the default case the file is downloaded into the Downloads folder as openjdk-13_osx-x64_bin.tar.gz.
Extract the archive by double clicking on the .tar.gz archive.
This creates the jdk folder named jdk-13.jdk.
Now move that extracted folder to /Library/Java/JavaVirtualMachines.
This version will now show up as the default. Check with:
$ sudo java -version
$ sudo javac -version
Installation Instructions - Linux:
Open the Terminal Emulator and install OpenJDK with …
$ sudo apt-get update
$ sudo apt install default-jdk
On most recent OS versions this will install Java 13, which works well for our use. You also need to install ant to be able to generate the java bindings for OpenCV
$ sudo apt-get install ant
Follow the online instructions, and agree to the license agreement. You then need to set the JAVA_HOME property to point to the new Oracle Java framework.
$ sudo update-alternatives --config java
Select the version you want to use as default and copy the path to the installation. In my installation of Ubuntu this is at /usr/lib/jvm/java-8-openjdk/jre/bin/java.
Add the JAVA_HOME definition for the path to your jre into your /etc/environments login file. You can only do that when you are logged in as ‘root’, then logout from ‘root’ with exit. Touch the new version of /etc/environment with the command source.
$ sudo -i
$ echo 'JAVA_HOME=/usr/lib/jvm/java-8-openjdk-amd64' >> /etc/environment
$ exit
$ source /etc/environment
After this your $JAVA_HOME path should be set. echo $JAVA_HOME should report
usr/lib/jvm/java-8-openjdk-amd64
Installation #2 - Java IDE
Eclipse, Netbeans, and IntelliJ are programming Environments for Java.
Test whether Netbeans/Eclipse/IntelliJ is already installed
Search for Eclipse, Netbeans, or IntelliJ. If you find it, start the application, open the Preferences dialog by clicking on the Eclipse menu and selecting the Preferences menu item (MacOSX) or clicking on the Windows menu and selecting the Preferences menu item (Linux).
- YES:
- You are fine if you have Netbeans or Eclipse with Java already.
- Proceed to Installation #3.
NO:
If you do not find the Eclipse (or Netbeans) Application in your installation, install an IDE.
Download the Eclipse IDE for Java Developers package for your OS. I am using Eclipse Photon (i.e. version 4.8) along with Java 11. If you prefer Netbeans, go to Apache Netbeans Downloads and use version 9.
Uncompress the archive, and drag the resulting Eclipse Application into your Applications folder. Start Eclipse and confirm the default workspace in the next window. Check the “Use this as the default …” box.
OpenCV 3 requires Java version 8 or higher. To confirm a compatible Java Runtime Environment (JRE) for your programming, select Menu Eclipse -> Preferences... and expand the item Java. A version of Java 1.8 should be your minimal version in Installed JREs. Java 13 is the most recent stable version compatible with the ARC
Select the Java Browsing Perspective in “Window” -> “Perspective” -> “Open Perspective” -> “Java Browsing”.
Installation #3 - OpenCV
OpenCV has emerged as the dominant technology to interface with video cameras, read their frame buffers, and process the resulting frames. Use of OpenCV requires successful installation of the library along with its dependencies. This blog guides you through the steps necessary for using OpenCV on MacOSX and Linux.
Test whether OpenCV and Java Bindings are already installed
Open the Terminal application and test for opencv:
$ pkg-config --modversion opencv
Then check whether opencv contains the java bindings in one of these locations:
$ ls /opt/local/share/OpenCV/java/
$ ls /usr/local/share/OpenCV/java/
$ ls /usr/share/OpenCV/java/
- YES:
-
You are all set if your system reports OpenCV
3.2.0or higher
and if the/usr/share/OpenCV/java/folder contains the following file
opencv-320.jar -
On Linux, the dynamic library itself has extension ‘.so’ instead of ‘.dylib’ and should be at
/usr/lib/jni/. If so, the system already has a recent enough version of the OpenCV library installed, along with the needed bindings. Proceed to Installation #4.
NO:
If the Terminal reports an earlier version of OpenCV, or does not find this library at all, then you need to download the library.
Installation instructions – Mac OSX:
For Mac OSX this set of instructions covers OSX 10.11 (and newer), but may work on older versions of OSX as well (not tested though). The simplest way to install is via the package installer MacPorts or Brew.
Current caution flag - as of 11/6/19 - use Brew instead of MacPorts - MacPorts currently installs OpenCV 3.4.7, a version which has issues with recognizing and accessing usb cameras attached to the system.
For MacPorts select the version of MacPorts for your installed version of OSX from here and download it. Double click the MacPorts*.pkg and follow the instructions.
Then open the Terminal In your Applications/Utilities folder and type …
$ sudo port selfupdate
This will update MacPorts with the most recent information on package versions. The command sudo means “superuser do” and will require that you type in your computer’s password. Once the self-update has completed, it will prompt you to install the Xcode command line tools. Agree to the install as well as accept the license.
Alternatively, you can manually perform an install of the Xcode Command Line Tools with …
$ sudo xcode-select --install
$ sudo xcodebuild -license
Then install opencv with java bindings using your spanking new version of javac, MacPorts and Xcode tools.
$ sudo port install opencv +java
No worries about "Warning: Xcode does not appear to be installed… " - there is no need for the full version of Xcode here. MacPorts will figure out which libraries are needed for OpenCV, and it will go through installing each one in the correct order. MacPorts will slowly crunch through the dependencies for ant, ffmpeg, and others.
Be prepared that this may take some time. When you get the Terminal message that no broken links were found, then you are cooking with gas.
The default destination for OpenCV is in directory /opt/local/share/OpenCV/. The java bindings for Opencv are installed in directory /opt/local/share/OpenCV/java/.
To install Homebrew open the terminal and issue this command (on a single line)...
$ ruby -e "$(curl -fsSL https://raw.githubusercontent.com/Homebrew/install/master/install)"
/usr/local/include and the corresponding native libraries into /usr/local/lib. Now install the casks ...
$ brew install caskroom/cask/brew-cask
$ brew update
$ brew install opencv
Installation instructions – Linux:
Install OpenCV from the repository,
$ sudo apt-get update
$ sudo apt-get install libopencv-dev
This will install the opencv-*.jar file at /usr/share/OpenCV/java/ and libopencv-*.so in /usr/lib/jni.
Installation #4 - Import the ARCController Project into IDE and Run
Eclipse
-
Download the zip compressed eclipse archive for the ARC Controller.
-
Copy the downloaded file into your Eclipse workspace and unzip the archive.
-
In Eclipse, go to your package explorer by clicking on the Windows menu and then selecting Show View > Package Explorer menu items.
-
Start a New Java Project by clicking on the New menu, Project menu item, and then under the Java section, select Java Project.
-
In the Java Project Wizard, enter Project name JavaGrinders_ARC and click the Finish Button.
This will import the ARC project into your package explorer. -
Navigate into your JavaGrinders_ARC -> src -> _ARC and select the file ARCController.java.
-
Under the menu Run, click on the menu item Run.
On startup, the tracker program will first look for a video camera (and your Arduino, if applicable). It will then start the tracker and open the main window.
NetBeans
-
Download the zip compressed netbeans archive for the ARC Controller.
-
In Netbeans, click on the menu File > Import Project > From ZIP… and browse to the downloaded zip archive.
-
Navigate into your JavaGrinders_ARC > Source Packages > _ARC and select the file ARCController.java.
-
Under the menu Run, click on the menu item Run Project.
On startup, the tracker program will first look for a video camera (and your Arduino, if applicable). It will then start the tracker and open the main window.
Installation #5 (optional) - Confirm that the plugged-in Arduino is loaded as a USB communication device (CDC)
Without having the Arduino pluged into a USB port, open the Terminal application, and type
$ ls /dev/tty*
This will report all currently established devices in this category.
Then plug the Arduino into a USB port and reissue the command. If the system contains a driver for the serial chip of the Arduino and is able to load it, a new device will appear in this list.
- YES:
- You are all set if your system finds a new device of sub-type “abstract control model” (ACM).
- On mac, this will list something like:
-
/dev/tty.usbmodem1A21 - On Linux Ubuntu, it will be something like:
-
/dev/ttyACM0
NO:
If the Terminal fails to establish a communication channel with the Arduino you will have to delve into drivers.
Installation instructions – Mac OSX:
Original Arduinos use an FTDI usb to serial chip which should be recognized by the MacOS automatically. If you use a cheaper Arduino clone (like I do), chances are that the manufacturer has replaced the FTDI chip with the cheaper CH34X version from Jiangsu Qinheng Co., Ltd. The likely outcome is that the board is not recognized as a valid serial port until you have downloaded and installed the relevant driver. After restarting the computer, your Terminal window should report a valid serial port associated with the Arduino.
Installation instructions – Linux:
Modern versions of the Linux kernel have the driver for this chip included. Consider upgrading to Ubuntu 18.04 or later.
Installation #6 (optional) - Install JArduino Firmware on Arduino for stimulus delivery
You need the Arduino IDE to communicate with the Arduino board (currently at version 1.8.5).
-
Download the JArduino Folder containing the JArduino Firmware and place the extracted folder into your Arduino Library.
(Location is inside your Sketchbook Folder as specified in Arduino > Preferences.)
-
Choose your Arduino Board in Tools > Board and select your port in Tools > Port
-
Click the JArduinoFirmware.ino window’s “Upload button” 1
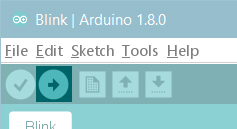
to upload the sketch to the board. -
After completion, shut down the Arduino IDE.
This upload procedure only needs to be done once as the Firmware will remain on the board indefinitely (or until another sketch is manually uploaded over it).
On Linux, you may run into a permission error in uploading your sketch to the
/dev/ttyACM0port.You can list permission for all ACM* ports with:
$ ls -l /dev/tty.ACM*which may report something like:
crw-rw---- 1 root dialout 188, 0 5 apr 23.01 ttyACM0To access the port, you need to add your username to the dialout group for access using
$ sudo usermod -a -G dialout <username>
Note:
This page was last updated November 20, 2019.
The most recent up-to-date instructions for installations can always be found on the JavaGrinders-ARC blog maintained by Dr. Robert Huber at Bowling Green State University.
For more information and support, please contact the owner of this repo or refer to the Nat Prot article for contact information .
Image from https://www.arduino.cc/en/Guide/ArduinoUnoWiFi ↩︎